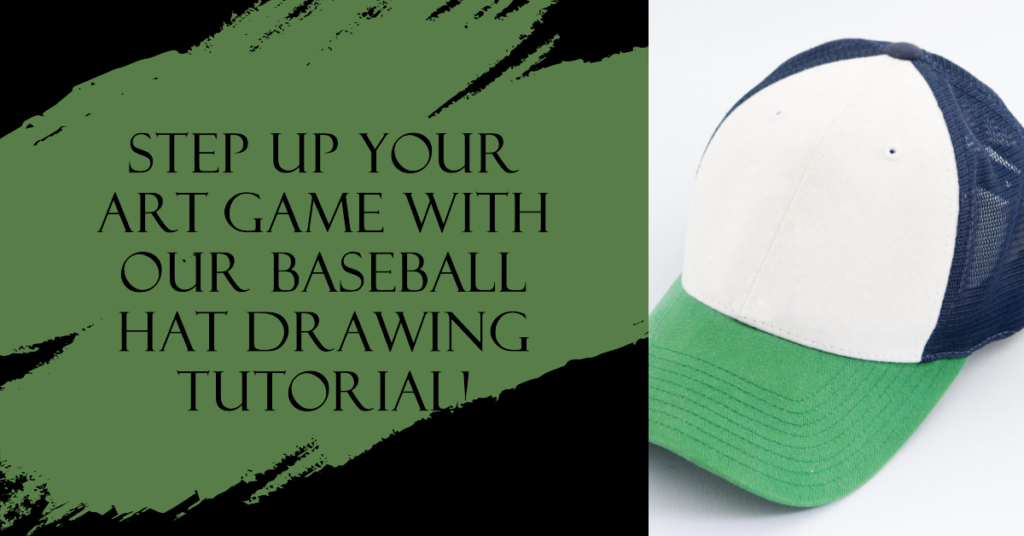
Unlock the secrets of drawing a baseball hat with our beginner-friendly guide on “how to draw a baseball hat”.
To draw a baseball hat, start by sketching an oval shape for the crown and a rounded rectangle shape for the bill. Then, add details such as stitching lines, a strap, and any logos or designs.
Getting Started With How to Draw a Baseball Hat

Any kid would like to know how to draw a baseball hat. If you are a parent or kid, this article is for you.
Drawing a baseball hat can be a fun and rewarding experience for artists of all skill levels. Whether you’re a beginner or a seasoned artist, understanding the basic structure of a baseball hat and choosing the right reference image can significantly improve your drawing.
This section will discuss the tools and materials needed, the basic structure of a baseball hat, and how to choose a reference image for better understanding.
Tools And Materials Needed:
To start drawing a baseball hat, you’ll need the following tools and materials:
- Pencil: A good-quality pencil is essential for sketching and adding details to your drawing.
- Eraser: An eraser will come in handy for correcting mistakes and refining your lines.
- Paper: Use a drawing paper or sketchbook to bring your baseball hat to life.
- Reference image: A reference image of a baseball hat will help you understand the structure and details more accurately.
Understanding The Basic Structure Of A Baseball Hat:
Before you begin drawing, it’s essential to familiarize yourself with the basic structure of a baseball hat. Here are the key elements to pay attention to:
- Crown: The crown is the rounded part of the hat that fits snugly on the head.
- Brim: The brim is the flat, slightly curved part extending outward from the crown. It provides shade and protects the face from the sun.
- Panels: Baseball hats are typically made up of several panels stitched together. Each forum has a unique shape, contributing to the overall structure of the cap.
- Eyelets: Small holes on the hat’s crown provide ventilation. They are usually placed on the front two panels of the hat.
- Strap: Some baseball hats have an adjustable strap at the back for a better fit. This strap can vary in design and placement depending on the hat style.
Understanding these components will help you accurately depict the structure of a baseball hat in your drawing.
Choosing A Reference Image For Better Understanding:
Selecting a reference image of a baseball hat is helpful to ensure a more realistic and accurate drawing. Here are some tips for selecting the proper reference:
- High-resolution: Choose a high-quality and high-resolution reference image to see the details.
- Multiple angles: Look for reference images that showcase the hat from different angles, such as front, side, and back. This will give you a more comprehensive understanding of its structure.
- Precise details: Ensure the reference image has accurate information on the panels, brim, crown, and any other features you want to include in your drawing.
- Personal preference: Consider selecting a reference image that matches the style of the baseball hat you want to draw. This can be helpful if you have a specific design or brand in mind.
By choosing a suitable reference image, you’ll better grasp accurately the proportions, shapes, and details necessary to draw a baseball hat.
With these steps in mind, you’re now ready to dive into the exciting process of drawing a baseball hat. Remember to take your time and practice regularly to improve your skills. Happy drawing!
Sketching The Outline and Basic Shape of the Baseball Hat

To draw a baseball hat, sketch the outline and basic shape. Use simple lines and curves to capture the hat’s structure, focusing on its brim, crown, and strap. This initial step sets the foundation for adding details and shading later on.
Starting with a rough sketch of the overall shape:
When drawing a baseball hat, beginning with a rough sketch to establish the overall body is essential. Follow these steps to get started:
- Begin by drawing an oval shape for the crown of the hat. This will serve as the foundation for the rest of the drawing.
- Next, draw a curved line connecting the edges of the oval shape. This will create the brim of the hat.
- Sketch a vertical line down the center of the oval shape to divide it into two halves. This will help ensure symmetry in your drawing.
- Add two small curved lines near the bottom of the oval shape to indicate the ear openings.
- Finally, draw two small ovals near the top of the oval shape to represent the eyelets.
Adding guidelines for symmetry and proportions:
To achieve accurate proportions and symmetry in your baseball hat drawing, follow these guidelines:
- Draw a horizontal line across the center of the oval shape. This line will serve as a guide to position the facial features of the hat.
- Divide the oval shape into thirds vertically by adding two more horizontal lines. The upper third will be the hat’s crown, the middle third will be the brim, and the lower third will be the ear openings.
- Use the vertical line in the center of the oval shape to ensure that both sides are symmetrical. You can compare the left and right sides while refining the outline.
Refining the outline and adjusting for perspective:
Once you have sketched the basic shape and added guidelines, it’s time to refine the design and adapt it for view:
- Review your rough sketch with clean, confident lines to define the hat’s shape. Pay attention to the curves and angles of the crown and brim.
- Consider the perspective of the hat. Adjust the brim and eyelets to create a realistic representation if drawing it from a specific angle.
- Erase any unnecessary guidelines and smoothen out any rough edges. This will give your drawing a clean and polished look.
- Take a step back to assess the proportions and make any necessary adjustments. Ensure that the crown, brim, and ear openings are in the right proportions before moving forward.
Remember, practice makes perfect. Don’t be afraid to experiment and refine your technique as you continue to draw baseball hats.
Adding Depth and Details To The Hat
These simple tips teach you how to give your baseball hat drawings depth and detail. Enhance your artistic skills and bring your hat illustrations to life with step-by-step instructions.
Creating The Illusion Of Fabric Folds And Wrinkles:
- Use shading techniques to create the appearance of fabric folds and wrinkles on the baseball hat.
- Start by drawing two curved lines across the top of the hat. These lines will represent the wrinkles formed when the cap is worn.
- Add smaller curved lines within the larger ones to create depth and texture.
- Use hatching and crosshatching techniques to darken specific areas and emphasize the folds.
- Blend the shading with a blending stump or a soft pencil to smooth the transition between light and dark areas.
- Remember to observe reference images or authentic hats to depict the fabric folds and wrinkles accurately.
Adding Shading To Give The Hat A Three-Dimensional Look:
- Start by identifying the light source. This will determine the placement and intensity of the shading.
- Use soft pencil strokes or a blending stump to gradually darken the areas away from the light source.
- Build up the shading layer by layer, gradually increasing the darkness to create depth.
- Use crosshatching or stippling (dotting) for texture shading to make the hat appear more realistic.
- Be mindful of how much shading is needed to add a three-dimensional effect without overpowering the overall drawing.
Highlighting Important Features Such As Stitching And Logo:
- Pay close attention to the stitching details on the hat. Draw fine lines representing the stitches, ensuring they follow the hat’s shape.
- Darken the stitching lines slightly to make them stand out, but avoid making them too thick or heavy.
- If a logo is on the hat, focus on drawing the logo accurately and in proportion to the cap.
- Use crisp, confident lines to capture the details of the logo without overpowering the rest of the drawing.
- Enhance the logo by shading and adding depth to make it look realistic
- Ensure that the stitches and logo align with the overall perspective and shape of the hat.
With these techniques, you can add depth and details to your baseball hat drawing, creating a realistic and visually appealing illustration. Keep practicing and experimenting with different shading techniques to refine your skills and bring your picture to life.
Enhancing Realism With Textures And Patterns
Learn to draw a baseball hat with enhanced realism using textures and patterns. This tutorial will guide you in creating a detailed and authentic-looking hat design.
Drawing a baseball hat is not just about capturing its basic shape and form. To bring your drawing to life and add that extra touch of realism, paying attention to the textures and patterns that make up the hat’s design is essential.
Whether you’re working with cotton, Denim, or mesh materials, incorporating various elements can take your drawing to the next level. Here are some tips on how to enhance realism with textures and patterns:
Incorporating Different Hat Materials Like Cotton, Denim, Or Mesh:
- Choose the correct reference: Before drawing, find reference images of different hat materials like cotton, Denim, or mesh. This will help you understand each material’s specific textures and patterns.
- Observe the details: Look closely at the reference images and notice how the fabric behaves. Cotton may have a slightly rough texture, while Denim can have a more distinct weave pattern. Mesh will have an open, net-like structure. Please pay attention to these details, as they will significantly contribute to the realism of your drawing.
- Depict the fabric’s characteristics: Use shading techniques to create the illusion of different materials. You can add subtle crosshatching or light lines to represent the texture. For cotton, Denim can be depicted with a combination of thin diagonal lines and shading to mimic the surface of its weave. Mesh can be created by using small, repeated patterns or dots to simulate the holes in the fabric.
Mastering Techniques For Drawing Realistic Textures And Patterns:
- Practice with different strokes: Experiment with different drawing strokes to mimic the textures of other materials. For example, curved strokes can imitate the surface of leather, while short, choppy strokes can create the appearance of wool or fur.
- Study real-life examples: Look at objects or photographs to understand the patterns and textures you want to recreate. By observing the small details, like the grain of wood or the scales on a reptile’s skin, you can better understand how to draw them realistically.
- Use shading techniques: Shading adds depth and realism to textures and patterns. You can make a flat drawing come alive by applying highlights and shadows in the right places. Start with light shading and gradually build to darker tones to transition between light and shadow.
Adding Logos, Team Names, Or Other Designs To The Hat:
- Research the design elements: Take some time to research the specific logos, team names, or other designs you want to incorporate into your hat drawing. Pay attention to the colors, shapes, and proportions of these elements.
- Sketch the design lightly: Start by lightly sketching the design on the hat using basic shapes and guidelines. This will help you ensure the design fits proportionally and is correctly positioned.
- Add details and refine the design: Once you have the basic outline, start adding details and refining the design. Use a combination of accurate lines and shading techniques to make the design stand out.
- Consider the perspective: Consider the hat’s view when adding logos or designs. Depending on the angle, the method may appear distorted or stretched. Pay attention to this aspect to maintain the realistic look of your drawing.
By incorporating different hat materials, mastering techniques for drawing textures and patterns, and adding unique designs, you can genuinely enhance the realism of your baseball hat drawing. So grab your pencil and paper, and let your creativity flourish as you bring your pictures to life!
Adding Personal Touches And Customizations
Learn how to draw a baseball hat with your personal touch and customizations. This step-by-step guide will help you create a unique design that stands out. Get creative and show off your style!
Experimenting With Different Color Palettes And Combinations:
- Consider using contrasting colors to make your baseball hat design visually striking.
- Experiment with various color palettes to find the best combination that aligns with your style.
- Try different shades of the same color to add depth and dimension to your design.
- Explore color psychology to evoke specific emotions or convey a particular message through your hat design.
- Remember the colors associated with your favorite sports team or brand to create a design that represents your affinity.
Customizing The Hat With Personal Logos, Symbols, Or Initials:
- Incorporate your pogo or symbol onto the baseball hat for a unique and personalized touch.
- Add your initials or those of a loved one to create a customized hat that stands out.
- Consider using symbols or icons that hold significance to you, such as a favorite sports team’s emblem, a favorite animal, or a meaningful quote.
- Use various fonts and sizes to make the personalization visually appealing and distinctive.
Creating Unique Designs Like Distressed Or Worn-Out Effects:
- Give your baseball hat a vintage or worn-out look by incorporating distressed effects.
- Experiment with sanding, bleaching, or fabric fraying to achieve the desired worn-out effect.
- Apply paint splatters or patches to create an intentionally distressed appearance.
- Explore different design elements, such as ripped edges or faded colors, to add character and uniqueness to your hat.
- Be mindful of maintaining the structural integrity of the hat while creating a distressed or worn-out effect.
Recognizing a baseball hat allows you to showcase your style and creativity. Experiment with color palettes, add individual logos or symbols and create unique designs like distressed effects to make your hat memorable. Embrace your individuality and have fun with the customization process!
Troubleshooting Common Challenges In Baseball Hat Drawing
Discover tips and techniques to troubleshoot common challenges when drawing baseball hats. Improve your skills and create realistic and detailed drawings of these iconic accessories.
Drawing a baseball hat may seem simple, but it can present its fair share of challenges. Whether you’re grappling with perspective and foreshortening issues, struggling to capture intricate details, or dealing with mistakes and adjustments, this guide will help you overcome these common hurdles.
So, let’s dive into some techniques to tackle these challenges head-on:
Dealing With Perspective And Foreshortening Issues:
- Understand the concepts of perspective and foreshortening to create a realistic-looking hat.
- Use guidelines and basic shapes to map out the hat’s structure before adding details.
- Pay attention to the angle and size of the brim, crown, and side panels to maintain proper proportions.
- Practice sketching the hat from different perspectives to enhance your understanding of how it changes in various angles.
- Experiment with shading and shadowing to give the hat depth and dimension, bringing it to life.
Overcoming Difficulties In Drawing Intricate Details:
- Break down complex details into simpler shapes before adding finer lines and textures.
- Observe reference images closely, paying attention to the texture of the fabric, stitching, and any logos or designs on the hat.
- Different pencil techniques, such as crosshatching or stippling, to effectively replicate the textures
- Start with light pencil strokes and gradually build the intensity to achieve depth and realism.
- Remember that practice makes perfect, so don’t get discouraged if intricate details take time to master.
Correcting Mistakes And Making Adjustments Along The Way:
- Don’t panic when making mistakes; mistakes are essential to the artistic process.
- Use an eraser to remove any unwanted lines or shapes, making sure to be gentle to avoid damaging the paper.
- Make minor adjustments gradually rather than rushing to fix errors simultaneously.
- Step back, take breaks, and view your drawing from a distance to spot any inconsistencies or areas that require adjustment.
- Remember, art is subjective, and every mistake is an opportunity to learn and improve.
By following these tips, you’ll be better equipped to overcome the challenges of drawing a baseball hat. Practice, patience, and persistence are vital to honing your skills. So grab your pencils and start sketching to bring your baseball hat drawings to the next level!
Tips And Tricks For A Professional Finish
Discover the secrets to achieving a professional finish when drawing a baseball hat. Learn expert tips and tricks to ensure your artwork leaves a lasting impression.
Drawing a baseball hat requires attention to detail and technique to achieve a professional-looking result. By utilizing different shading techniques, adding highlights and reflections, and framing the drawing properly, you can enhance realism and present your artwork in a polished manner.
Follow these tips and tricks to achieve a professional finish:
Utilizing Different Shading Techniques For A Polished Look:
- Start by determining the light source in your drawing. This will help you identify the areas that would be shaded.
- Use crosshatching to create shadows and add depth to the hat. Crosshatching involves drawing parallel lines in different directions to create shading effects.
- Experiment with hatching, where you draw parallel lines in one direction to create shading. Vary the spacing and thickness of the lines to achieve different textures.
- Try stippling, a technique where you use small dots to create shading. This technique can be time-consuming but adds a unique textural effect to your drawing.
Adding Highlights And Reflections To Enhance Realism:
- Identify areas where light would hit the hat, such as the brim or the front panel. These areas will have highlights.
- Use a white pencil or eraser to add highlights to those areas. Lightly blend the highlights into the surrounding shading to create a natural look.
- To create reflections, lightly shade areas adjacent to the highlights. This will give the illusion of shiny or reflective surfaces.
- Pay attention to the direction and intensity of the light source to ensure consistent placement of highlights and reflections.
Framing The Drawing To Present It Professionally:
- Consider the composition of your drawing. Position the hat in an appealing way within the frame, considering the rule of thirds or other compositional techniques.
- Use clean, straight lines to outline the hat and define its shape. This will create a more finished and professional appearance.
- Add details such as stitching, logos, or any other distinctive features. These details will contribute to the overall realistic look of the drawing.
- Finally, use a high-quality scanner or camera to capture your drawing accurately. Make any necessary adjustments in image editing software to ensure the colors and details are accurate to the original artwork.
By incorporating these tips and tricks into your drawing process, you can achieve a professional finish for your baseball hat artwork. Experiment with different shading techniques, pay attention to light sources and reflections and present your drawing well-composedly.
Showcasing And Sharing Your Baseball Hat Drawings
Learn how to draw a baseball hat and showcase your drawings with our step-by-step guide. Share your artwork with fellow enthusiasts and gain inspiration from a community of talented artists. Get started today and unleash your creativity!
Scanning Or Photographing The Artwork For Digital Presentation
A few options are available if you want to showcase your baseball hat drawings digitally. BScanningor photographing your artwork lets you easily share it online or participate in various digital platforms. Here are some steps to get you started:
- Use a high-quality scanner or camera to capture your artwork.
- Ensure good lighting conditions to get clear and vibrant results.
- Place your drawing on a clean, flat surface before capturing the image.
- Make sure the artwork is centered and in focus.
- Adjust the settings on your scanner or camera to enhance the clarity and color accuracy.
- Save your scanned or captured image in a suitable format, such as JPEG or PNG.
- Edit the image if necessary, using photo editing software to enhance the colors, adjust brightness and contrast, or crop the image.
Sharing Your Drawings On Social Media Or Art Platforms
Once you have digital versions of your baseball hat drawings, you can easily share them with a broader audience on social media or art platforms. Here are some ways to make your pictures more visible:
- Create accounts on popular social media platforms like Instagram, Facebook, or Twitter. These platforms have a large user base, increasing the chances of your artwork reaching a wider audience.
- Use relevant hashtags when posting your drawings on social media. Hashtags can help your artwork get discovered by people who are interested in similar topics.
- Engage with the community by commenting on other artists’ work and responding to comments on your posts. Building connections and relationships within the art community can increase exposure and opportunities.
- Join online art platforms specifically designed for showcasing artwork. Websites like Behance, DeviantArt, or Dribbble allow you to create a portfolio and connect with other artists and art enthusiasts.
- Participate in art challenges or contests organized by social media groups, art communities, or brands. These activities can give your drawings more visibility and attract new followers or clients.
Remember, sharing your artwork digitally opens up a world of possibilities for exposure and connections. Don’t hesitate to experiment with different platforms and engage with the art community to make the most of your baseball hat drawings.
Continuing Your Baseball Hat Drawing Journey
Discover the art of drawing baseball hats with ease. Unleash your creativity and take your skills to the next level on your baseball hat drawing journey.
Now that you have learned the basics of drawing a baseball hat, it’s time to expand your skills and explore different styles and methods of hat drawing. This will enhance your creativity and allow you to develop your unique approach to drawing hats.
In this section, we will focus on three key aspects to continue your baseball hat drawing journey:
Expanding Your Skills With Other Fashion-Related Drawings:
- Experiment with drawing different types of hats, such as fedoras, beanies, or snapbacks.
- Practice sketching various fashion accessories like sunglasses, bags, and shoes to complement your hat drawings.
- Explore drawing clothing items like jackets, t-shirts, and dresses to create complete fashion ensembles.
Exploring Different Styles And Methods Of How to Draw a Baseball Hat:
- Research different drawing styles, such as realistic, cartoon, or abstract, to find the one that resonates most with you.
- Experiment with shading, crosshatching, or stippling to add depth and texture to your hat drawings.
- Study the works of professional artists to learn from their unique approaches and incorporate their techniques into your hat drawings.
Seeking Inspiration From Renowned Artists And Their Techniques:
- Study the works of renowned artists like Leonardo da Vinci, Vincent van Gogh, or Frida Kahlo and analyze how they depict hats in their paintings.
- Observe the use of light, shadow, and perspective in the hat drawings of famous illustrators such as Beatrix Potter or Dr. Seuss.
- Visit art galleries or browse online platforms like Pinterest or Instagram to discover emerging artists who excel in hat drawing.
Remember that the key to progressing on how to draw a baseball hat is constantly practicing, exploring new styles, and seeking inspiration from artists who have mastered the craft. With dedication and a willingness to experiment, you will continue to improve and develop your unique style of hat drawing.
So, let your creativity soar, and enjoy the journey of becoming a skilled hat artist!
Frequently Asked Questions Of How To Draw A Baseball Hat
How Do You Draw A Baseball Hat From The Front?
To draw a baseball hat from the front, start with a curved line for the brim, add vertical lines for the crown, and then sketch the details, like the logo or stitching.
How to Draw A Baseball Hat On A Person?
To draw a baseball hat on a person, start with a basic circle for the top, add curved lines for the brim, and then sketch in details like the logo and any shading.
How Do You Draw A Baseball Head?
To draw a baseball head, sketch a round shape, add two curved lines for the baseball stitching, and fill in details such as eyes, nose, and mouth.
How To Decorate A Baseball Cap?
You can use various methods like embroidery, iron-on patches, fabric markers, or customized stickers to decorate a baseball cap.
Conclusion
Drawing a baseball hat may seem challenging initially, but you can do it easily with practice and following these simple steps. Start by removing the outline of the cap and paying attention to its curves and angles. Next, add the details like the brim, stitching, and logos or designs.
Remember to shade the hat to give it a three-dimensional look. Practice shading techniques to add depth and realism to your drawing. Keep in mind that reference images are your best friends when it comes to capturing the shape and details accurately.
So, don’t hesitate to use them. Lastly, don’t be afraid to experiment with different styles and techniques to develop your unique drawing style. Do not stick only with this article on how to draw a baseball hat. With patience and determination, you’ll be able to draw a baseball hat that looks realistic and impressive.
Happy drawing!